Before You Start: Prerequisites
Your ether.fi Cash card must already be activated before you can add it to Apple Pay. This means you’ve completed the KYC process (phone OTP + government ID + liveness selfie) and received your virtual card number—you won’t need to wait for the physical card to arrive. Digital-wallet setup is instant once your card is active.
Signal: If you’ve just signed up, you can add your virtual card to Apple Pay within minutes of activation, long before your physical plastic card ships (15+ business days for standard, 1–3 for Pinnacle tier).
You’ll also need an iPhone running iOS 16 or later, or an Apple Watch running watchOS 9+. Make sure your device is set up with Face ID, Touch ID, or a passcode—Apple requires device authentication to add payment methods.
Why it matters: Skipping authentication setup is the #1 reason new users can’t complete this step. If your iPhone doesn’t have a lock, set one now in Settings > Face ID & Passcode.
Have your ether.fi Cash card details handy:
- Card number (16 digits)
- Expiry date
- CVV (3-digit code on the back)
You’ll find all three in the ether.fi app under “Card Details” or “Wallet.” Copy and paste to avoid typos.
How to Add Your Crypto Card to Apple Pay: 5 Steps
Step 1: Open Wallet on your iPhone
Locate the Wallet app (icon looks like a white credit card). Tap the + button in the top-right corner to add a new card.
Step 2: Choose “Credit or Debit Card”
Apple will ask what type of card you’re adding. Select Credit or Debit Card, not “Identity Card” or other options. ether.fi Cash registers as a Visa debit card.
Step 3: Enter Your Card Details
Type (or paste) your 16-digit card number, expiry, and CVV. Apple’s camera can auto-read the number if you point it at your physical card once you receive it, but for now, manual entry is fastest.
Risk: Keep your card number and CVV private. Never screenshot or email these details to yourself or others. The Wallet app stores them in an encrypted vault on your iPhone—you don’t need a backup.
Step 4: Verify with ether.fi
Apple will ask you to confirm the card by either:
- Contacting your card issuer (ether.fi) automatically via app notification, or
- Entering a one-time code that ether.fi sends via in-app message or email.
Check the ether.fi app for prompts. This step usually completes in under 60 seconds.
Step 5: Set as Default (Optional)
If you have multiple cards in Wallet, you can tap Settings > Wallet & Apple Pay > Default Transaction Card and choose your ether.fi card. This makes it the card Apple Pay uses when you don’t explicitly select one.
Key metric: From activation to first Apple Pay tap = ≤ 3 minutes on average. The slowest part is usually step 4 (ether.fi’s verification), which can take 1–2 minutes if their servers are busy.
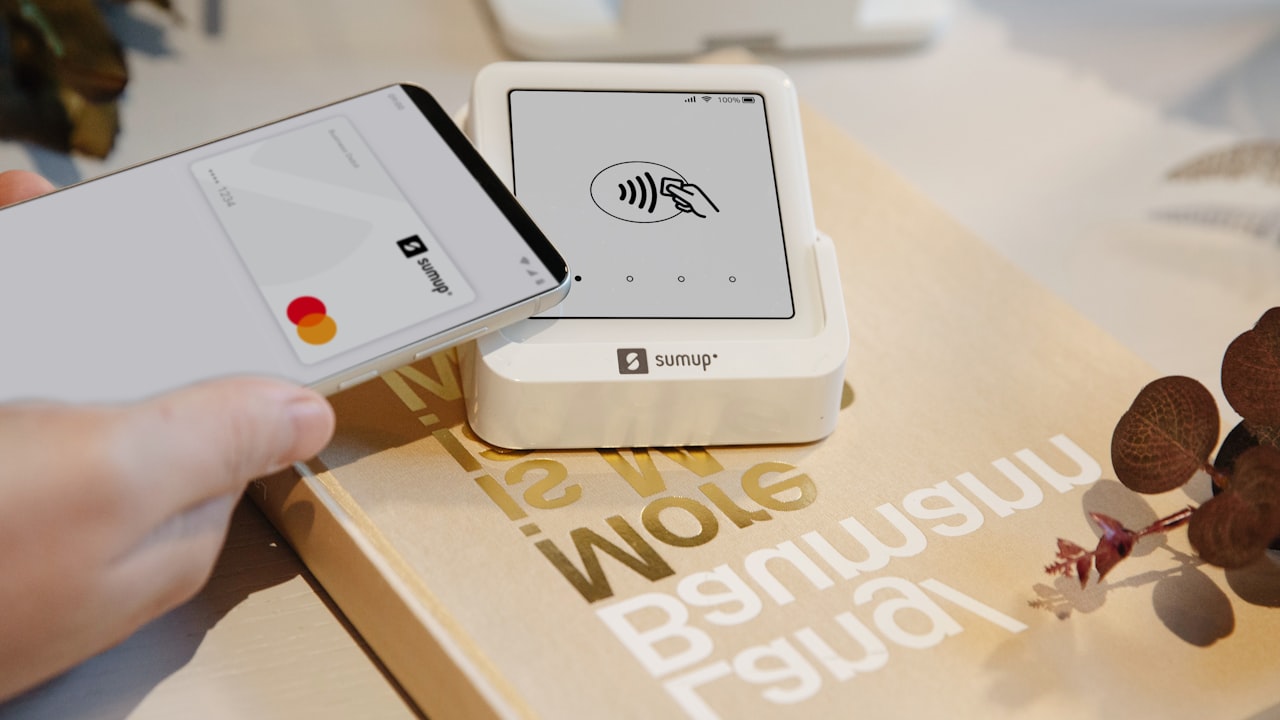
How to Use Your Crypto Card on Apple Pay at Checkout
Once added, paying with your ether.fi card via Apple Pay is one gesture:
- At the register: Hold your iPhone or Apple Watch near the contactless terminal (usually marked with a wave symbol or “NFC”).
- Authenticate: Face ID, Touch ID, or PIN — the phone will prompt you.
- Tap: Transaction completes in under 1 second.
- Receipt: Cashback accrues instantly (up to 3% on most purchases, up to 15% on food/dining promotions).
Why it matters: Crypto card payments don’t settle instantly like traditional debit cards. ether.fi typically processes transactions within 1–2 business days, so your available balance updates on a slight delay. This is normal and does not affect your real-time spending power—the balance shown in Wallet reflects your true available funds.
Your ether.fi staked balance (in ETH) does not change when you spend—the card draws from a linked stablecoin balance (USDC/USDT) that you fund separately via the app.
How to Add Your Crypto Card to Google Pay and Samsung Pay
If you also use Android devices or prefer Google’s ecosystem, the process is nearly identical:
Google Pay Setup (Android)
- Open Google Pay app (or Wallet on newer Android versions).
- Tap + Add payment method > Card.
- Enter your ether.fi card number, expiry, CVV.
- Verify via ether.fi app notification (same as Apple Pay).
- At checkout: hold your phone near the NFC terminal and authenticate with fingerprint or PIN.
Signal: Google Pay works on all NFC-enabled Android phones, even if your ether.fi account is based in Europe or South America. Geographic location doesn’t block digital-wallet setup—only the merchant’s terminal and your card’s country of issuance matter.
Samsung Pay Setup (Galaxy Phones)
- Open Samsung Pay (usually pre-installed; swipe up from home screen or search the app drawer).
- Tap + Add card.
- Enter your ether.fi card details.
- Verify with ether.fi (same ether.fi app notification).
- At checkout: hold your Galaxy phone near the terminal and authenticate.
Risk: Samsung Pay also supports magnetic-secure-transmission (MST), which means it works even on older card readers that don’t have NFC. This is a convenience advantage over Apple Pay and Google Pay, but it also means your card details are transmitted to older terminals, which may be less secure. If you’re in a country with older infrastructure, this is a trade-off: broader merchant coverage vs. slightly lower security on legacy readers.
Key metric: ether.fi supports all three platforms (Apple, Google, Samsung) equally. Your monthly spend limit of $2,000–$50,000 is shared across all wallets—adding the card to Apple Pay and Google Pay doesn’t grant you two separate limits.
Troubleshooting: Why Apple Pay Won’t Accept Your Crypto Card
”Card Not Eligible” or “Card Not Supported”
Cause 1: Card isn’t fully activated yet. Check the ether.fi app. If your card status shows “Pending” or “Awaiting KYC,” Apple Pay won’t accept it. Complete KYC first (identity verification takes 2–5 minutes).
Cause 2: Your country is outside ether.fi’s supported region. ether.fi Cash is not available in all countries. If you’re trying to add a card while logged in to an Apple ID in a prohibited country (Russia, Venezuela, China, India, North Korea, and others), Apple will block the card. Check the ether.fi help center for your country’s status. If you’re blocked, consider alternative cards like Crypto.com or RedotPay.
Cause 3: Your device isn’t compatible. Apple Pay requires iOS 16+ on iPhone or watchOS 9+ on Apple Watch. If you’re on iOS 15 or older, update your device.
”Verification Failed” or “Couldn’t Contact Issuer”
Cause 1: ether.fi’s verification servers are down or slow. Wait 5 minutes and try again. This is rare but happens during high traffic.
Cause 2: You entered the CVV or expiry incorrectly. Double-check your card details in the ether.fi app and re-enter them character by character. Common mistake: mixing up the expiry format (MM/YY vs. YY/MM).
Cause 3: Apple Pay didn’t receive the confirmation from ether.fi. Check the ether.fi app’s notification panel. If you see a pending verification request, approve it. If nothing appears after 2 minutes, manually verify by entering the one-time code that ether.fi sent via email.
Signal: If you’ve tried all three fixes and still see “Verification Failed,” contact ether.fi support in-app. They can force a re-verification or debug any back-end issues.
”This Card Already Exists in Your Wallet”
You’ve accidentally tried to add the same card twice. This is harmless. Simply delete the duplicate from Wallet and re-confirm your original card is active.
Security & Best Practices
Keep Your Card Details Secure
Never share your 16-digit card number, expiry, or CVV via email, chat, or social media. If ether.fi support ever asks for your CVV, that’s a red flag—they never need it. Report impersonators to ether.fi immediately.
Risk: Storing your card details in notes, screenshots, or password managers synced to the cloud increases your exposure if your iCloud or cloud account is compromised. Wallet’s encrypted storage is far safer.
Turn On Purchase Notifications
In your ether.fi app, enable in-app notifications for every payment over a certain threshold (e.g., $50). You’ll see alerts instantly and can dispute unauthorized transactions fast.
Use Strong Device Authentication
Your iPhone’s Face ID / Touch ID protects your Wallet. Don’t share your device passcode. Disable biometric unlock if you lend your phone to someone else.
Watch Your Monthly Limit
ether.fi enforces a tier-based monthly spend cap:
- Core tier: $2,000/month
- Luxe tier: $10,000/month
- Pinnacle tier: $50,000/month
Once you hit the limit, your card will decline at checkout (soft block, not permanent). Your limit resets on the 1st of each calendar month. Plan your big purchases accordingly.
Why it matters: These limits exist to reduce fraud risk and comply with financial regulations (AML / KYC). You can request a tier upgrade in the ether.fi app to increase your limit—upgrades are usually approved within 1 business day if your identity is fully verified.
What to Watch
- Card replacement: If you report your ether.fi card as lost or stolen, you’ll get a new card number. You’ll need to re-add it to Apple Pay (old card details won’t work).
- Expiry date changes: Your ether.fi card renews every 3–5 years. When it expires, you’ll need to update the expiry date in Wallet and any other apps where you’ve stored it.
- FX charges in non-USD/EUR regions: Using your ether.fi card in any currency other than USD or EUR incurs a 1% foreign-exchange fee. Check the ether.fi app for real-time FX rates before paying abroad.
- Stablecoin conversion delays: ether.fi requires you to convert ETH → stablecoin (USDC) before spending. This conversion can take 1–2 business days during periods of high blockchain traffic. Plan ahead if you’re traveling.
- Apple Pay updates: Major iOS updates sometimes reset your digital-wallet cards. You’ll get a notification to re-verify if this happens; it takes under 1 minute.
Bottom Line
- If you’re in a supported country (US, UK, EU excluding Netherlands/Estonia/Finland/Hungary, LATAM, APAC), adding your ether.fi Cash card to Apple Pay, Google Pay, or Samsung Pay is a 2–3 minute one-time setup. After that, you can spend your staked crypto with a contactless tap at 99% of merchants worldwide.
- If you haven’t opened an ether.fi account yet, get started [
FAQ
Q: Can I add multiple crypto cards to Apple Pay?
A: Yes. You can add your ether.fi card, a Crypto.com card, a Coinbase card, etc., all in the same Wallet. Just set one as your default if you want Apple Pay to use it automatically when you don’t tap to select. Your monthly spend limits are per card, not shared across cards.
Q: Will adding my card to Apple Pay drain my battery?
A: No. NFC radios are extremely power-efficient. One Apple Pay transaction uses less battery than a few seconds of screen time. Digital-wallet features have negligible battery impact.
Q: What if I lose my iPhone? Is my card still safe?
A: Yes. Your card details are encrypted on-device and also encrypted in Apple’s servers. If you lose your phone, use iCloud’s “Find My” to remotely lock or erase it. Your ether.fi card account itself (in the ether.fi app) has its own security layer—disabling your phone won’t disable your card. You’ll need to log back into the ether.fi app on a new device and re-add your card to Wallet.
Q: Can merchants see my real name when I pay with Apple Pay?
A: No. Apple Pay sends a tokenized card number (a temporary, encrypted substitute) to the merchant. Your real card number, expiry, and name stay hidden. This is a major security advantage over paying with a physical card.
Q: How do I know if my payment actually went through?
A: Check two places: your ether.fi app (transaction history tab) and the Apple Wallet receipt (tap the transaction in Wallet). ether.fi’s transaction log is the source of truth; Apple’s confirmation is just a first-pass receipt.
Q: Can I use Apple Pay on a website, or just in stores?
A: Both. In-store: tap your phone. Online (e-commerce): tap your Safari checkout and authenticate with Face ID / Touch ID, and Apple Pay auto-fills your ether.fi card number. Some websites still don’t support Apple Pay; for those, you’ll need to manually enter your card details (only do this on secure, HTTPS sites).
Risk Disclosure
DefyCard publishes affiliate-linked reviews; we earn a commission when you open an ether.fi account via our link. This does not affect your pricing or terms—you get the same rates and benefits whether you sign up directly or through us.
Crypto assets are volatile. Your ETH balance may fluctuate significantly. Your ether.fi card’s stablecoin balance (USDC) is pegged to USD but does not earn interest—it’s a settlement layer for spending. If you convert ETH to stablecoin and the crypto market rallies, you’ll have missed upside. Conversely, if the market crashes, your stablecoin balance is protected. Understand this trade-off before using a crypto card for long-term holding.
ether.fi Cash is not available in all countries or US states. Prohibited regions include: Belarus, Bangladesh, China, Cuba, Estonia, Finland, Hungary, India, Iraq, Israel, Nepal, Netherlands, North Korea, Philippines, Russia, Syria, Turkey, Ukraine, Venezuela, Vietnam, and 21 US states. Check the ether.fi help center to confirm your jurisdiction’s status. Using a VPN to circumvent country blocks may violate terms of service and is not recommended.
Apple Pay, Google Pay, and Samsung Pay are third-party platforms operated by Apple, Google, and Samsung respectively. They are subject to their own privacy and security policies. DefyCard is not responsible for their operations, outages, or policy changes. If you have concerns about Apple Pay’s privacy, review Apple’s privacy policy at apple.com/privacy.
Last verified: 2026-05-20.